NLorea Plugin Setup Guide
Preliminary Steps
Ensure that you have successfully installed the NLorea plugin prior to following this guide. The initial setup requires additional installations:
- WooCommerce Plugin: Essential for payment functionalities.
- AffiliateWP Plugin: Required if you intend to implement referral payment systems.
Creating Essential Pages
Navigate to the ‘Create Pages’ submenu found under the NLorea Menu on your dashboard. By clicking the ‘Create Page’ button, all necessary pages will be automatically generated.
Configuration Settings
Once the pages are established:
- Go to the ‘Settings’ submenu to adjust your URL configurations, login and registration appearance, and the setup of the welcome email.
- It’s crucial to update your Google reCAPTCHA by obtaining a new Secret Key and Site Key V2 to enhance login and registration security against spam.
Frontend Pages
Login, registration, and user profile pages are automatically created when you use the create page button mentioned above. You can also decide on the page by using shortcodes
- Login shortcode: [nlorea_login_form?]
- Registration shortcode: [nlorea_registration_form?]
- User profile shortcode: [nlorea_user_profle?]
- Revalidate shortcode: [nlorea_sa?]
- Confirm Reset Password shortcode: [nlorea_reset_password?]
remember to add [ at the begining and ] at the end when using this shortcode on your live page
User Profile
Users can change their names, and passwords, see their PIN expiration date, their referral earnings, affiliate’s URL, and also log out from here.
Advanced Submenu
Login Settings Tab
- Enable PIN: Activating this feature requires visitors to enter a valid PIN to register on your site. Disabling it will allow open registration without restrictions.
- Two-Step Registration: When enabled, users must validate their PIN before additional signup fields are displayed.
- IP Verification: This setting ensures that logins or signups are performed from registered IPs only. Any attempt from a different IP triggers a verification email to the user.
- Whitelisted IPs: Administrators can specify IPs that can bypass the regular security checks.
PIN Management Settings Tab
These settings become accessible only if the PIN feature is enabled:
- PIN URL Management: Customize URLs for purchasing, validating, or denying access to certain pages.
Purchase PIN Page shortcode [nlorea_checkout?]
Revalidate Page shortcode [nlorea_sa?]
Denied Page: A page to inform users why they were denied access, usually because their PIN has expired or is invalid. (Requires no shortcode)
- Manual PIN Upload: You can upload a PIN or multiple PIN manually. This is essential if you want to sell PIN offline. However, you must ensure you have set your Membership Levels in the Membership Settings Tab.
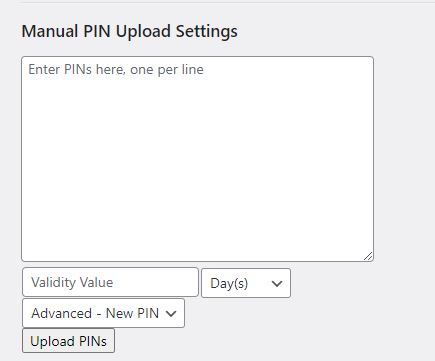
In validity value, enter 1, 2, 3, 20 etc, and select the period. For example: 3 Days.
The select field above the submit button will only be visible when you have set the membership level. If already set up, you can select a level to assign to the PIN you want to manually upload.
Lets say you enter
PIN field: 23456789s1c
Validity value: 2
Period: Weeks
Level: Premium
Once you submit, the PIN will be active for 2 weeks with a premium level. So if a user is assigned this PIN, they will be able to sign up and access any page with a premium level or additional access level assigned to those with a premium level. After 2 weeks, their PIN will expire, and will have to buy another PIN to continue accessing those pages but will remain a registered user.
Auto Generate PIN:
The PIN will be automatically generated based on PIN Type and Length specified by admin and only after payment is completed in the checkout. It does not conflict with manual PIN upload.
PIN Summary:
Admin can see how many unused PINs are available based on the expiration date.
Existing PINs
This will inform the admin how many unused PINs are generated (manually or automatically) but have not been used.
Membership Access Settings Tab
Currency Setup: Enter the currency code (e.g., USD) without symbols.
Access Level: This is where you set up your membership level.
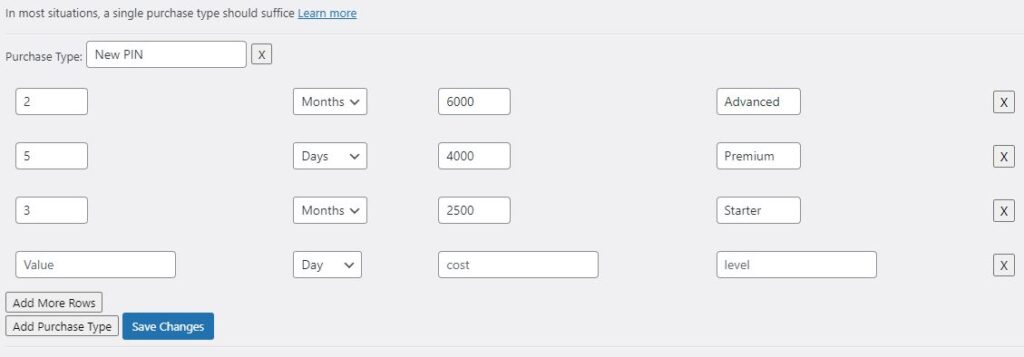
Purchase Type is more like a section. In most cases, you only need one purchase type. If however, your website caters to multiple sets of users, you can add more purchase types.
For example, Purchase Type can be New PIN, Renew PIN, New Student, Old Student, Art Students…. it can be anything. Your purchase type will also appear on your checkout page. After you have added a purchase type and name, you can start adding level rows to the purchase type. See the image above.
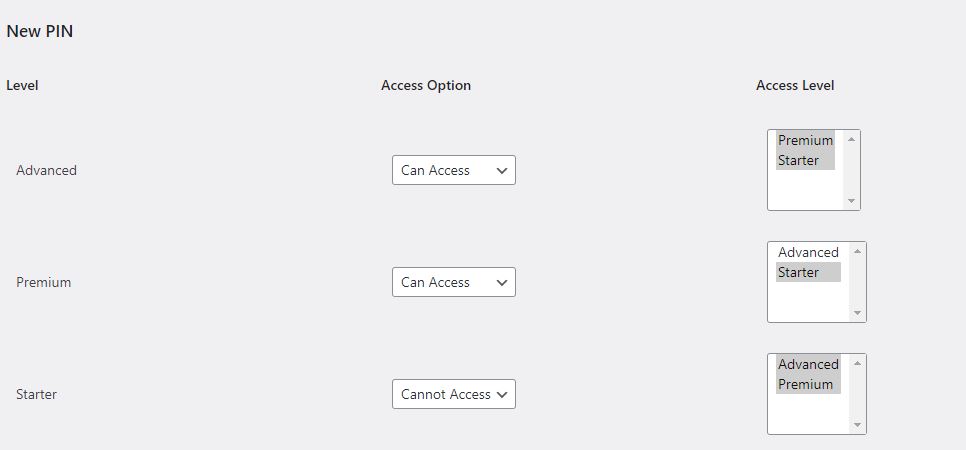
Access Level Management tab
In this section, you can specify which users can access certain levels. For instance, users at the Advanced level could be granted access to additional levels. If this feature is turned off, users can only access the specific level they purchased.
For example, an Advanced-level user could be granted access to other levels. To select multiple levels, press then the control or shift key.
AffiliateWP Integration Setup
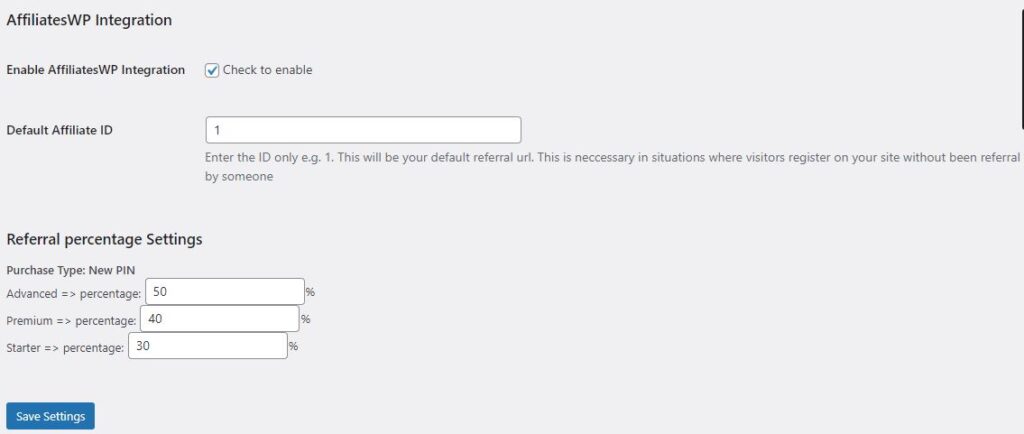
- Integration Activation: Tick the ‘Enable AffiliateWP Integration’ checkbox to activate the feature.
- Default Affiliate Identification: Input the default affiliate ID to be used as the fallback referral. This is particularly crucial for tracking registrations on your site that occur without an explicit affiliate referral.
Referral Percentage Settings
This section becomes accessible once the membership access level configuration is complete.
The ‘Referral Percentage Settings’ allow administrators to define commission rates applicable to various purchase types. These commissions are not fixed and can be tailored to align with your platform’s incentive structure. For instance, if a user associated with the Advanced Level refers a new user who purchases a Starter Level PIN, the referrer will be credited with a 30% commission of the transaction value.
WooCommerce setup
Go to your WooCommerce settings, scroll down to Currency options, and select your currency. It should be the same as the currency code at the membership level.
Next, go to your Payment tab on the same WooCommerce setting. Select your preferred payment gateway or download a payment gateway that supports WooCommerce.
Inside the payment gateway, look for “Autocomplete Order After Payment” and enable the option. The option ensures that when a payment is successful, PIN is generated and sent to the user.
Next, go to Account and Privacy. Uncheck all options except “Allow customers to place orders without an account” in Guest checkout
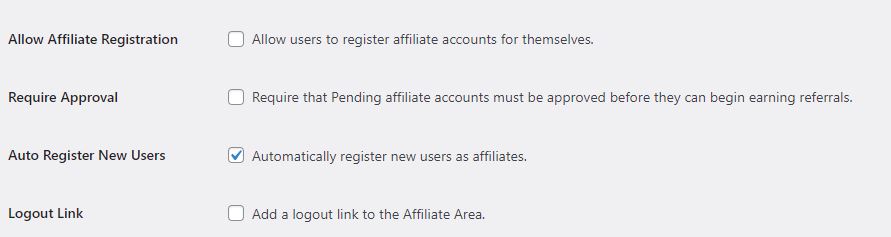
AffiliatesWP setup
Go to the settings menu and locate the Misc tab. Under this tag locate “Auto Register New Users” and enable it. Ensure you uncheck other options as seen in the image below.
Unblock IPs submenu
Here you can unblock IP addresses that were blocked due to many failed login or registration attempts
Teaser Shortcode
You can allow non-logged users to access restricted content by placing the teaser shortcode on the restricted page. [nlorea_teaser?] show to non-logged only [/nlorea_teaser]
Remove the ? on a live page
If you have any questions, please drop a comment!